
ZBrush - Export Curvature Map for texturing
Having an accurate Curvature map with a good range is super important in texturing. Out of the box, it can sound a bit tricky to find good settings in ZBrush. Here's a quick step by step to show you my workflow.
ZBrush - Export Curvature Map for texturing
Having an accurate looking Curvature map with a lot of range is super important in texturing. Out of the box, it can sound a bit tricky to find good settings in ZBrush. Here's a quick step by step to show you my workflow.
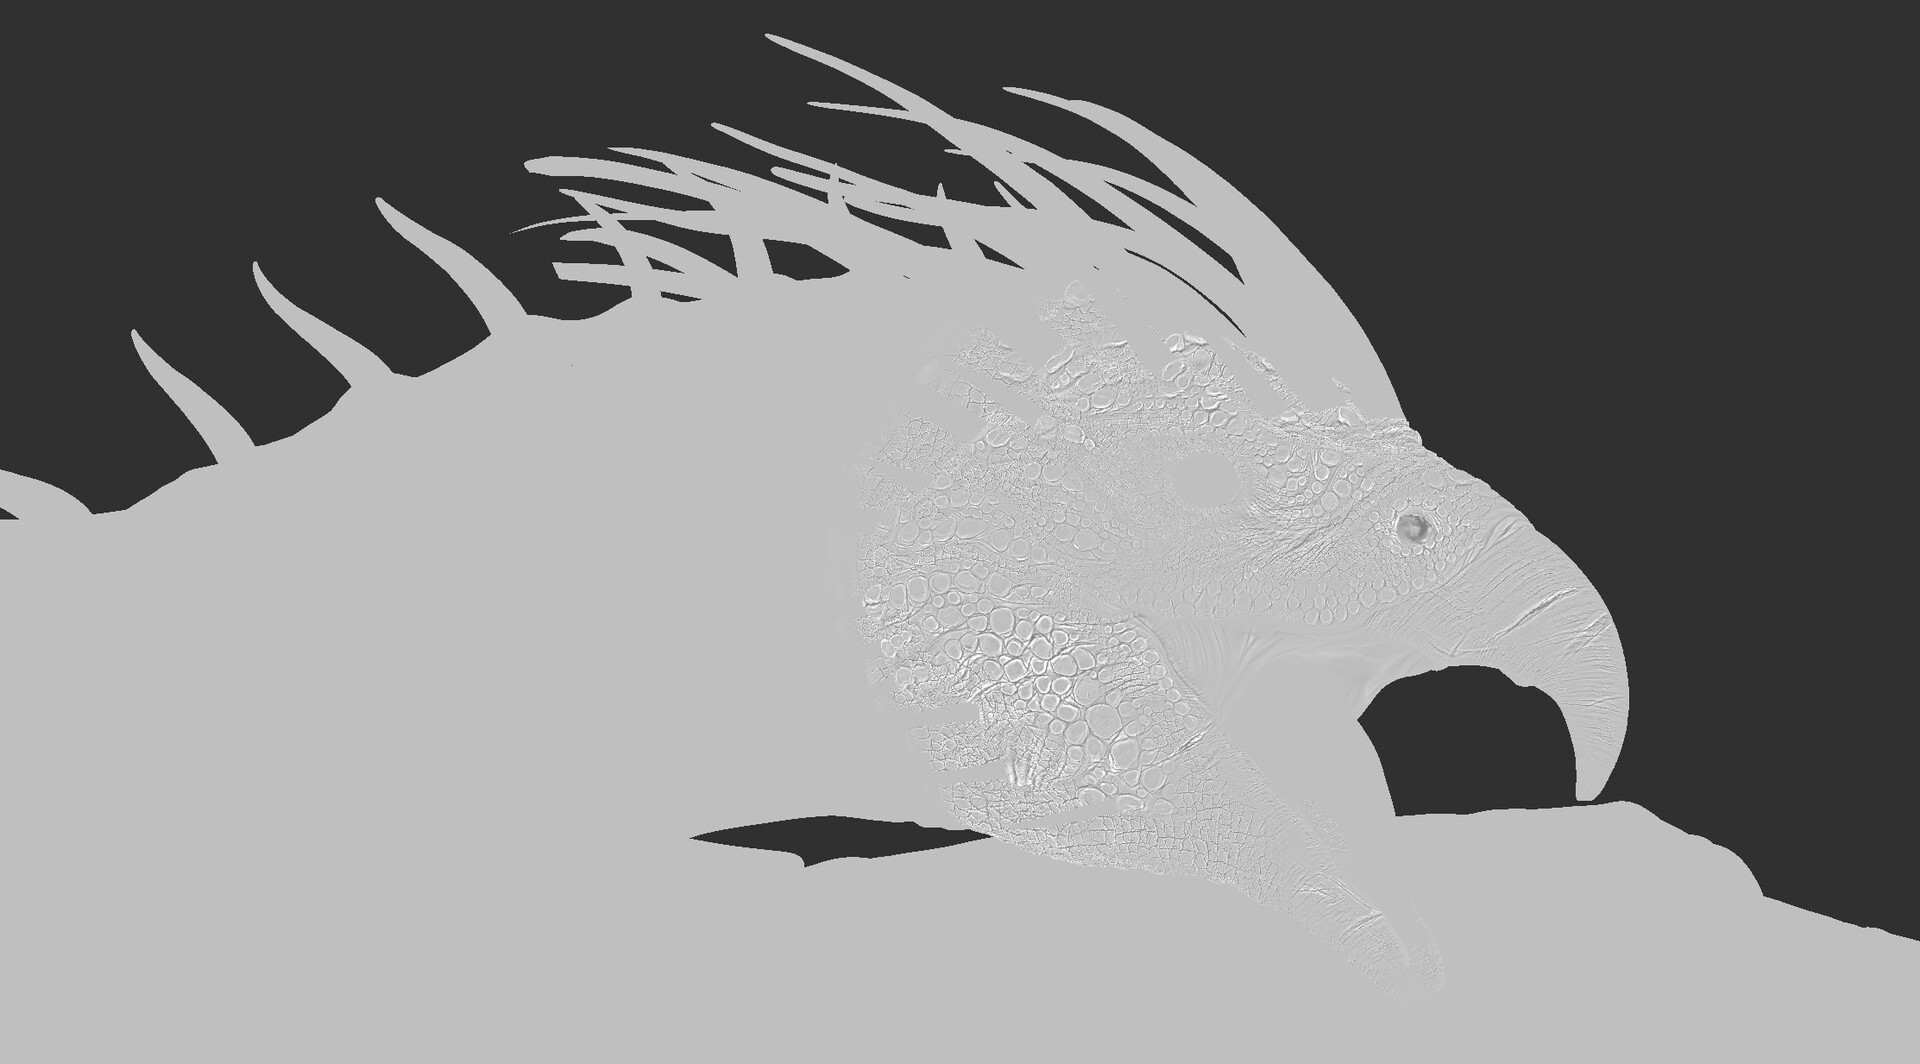
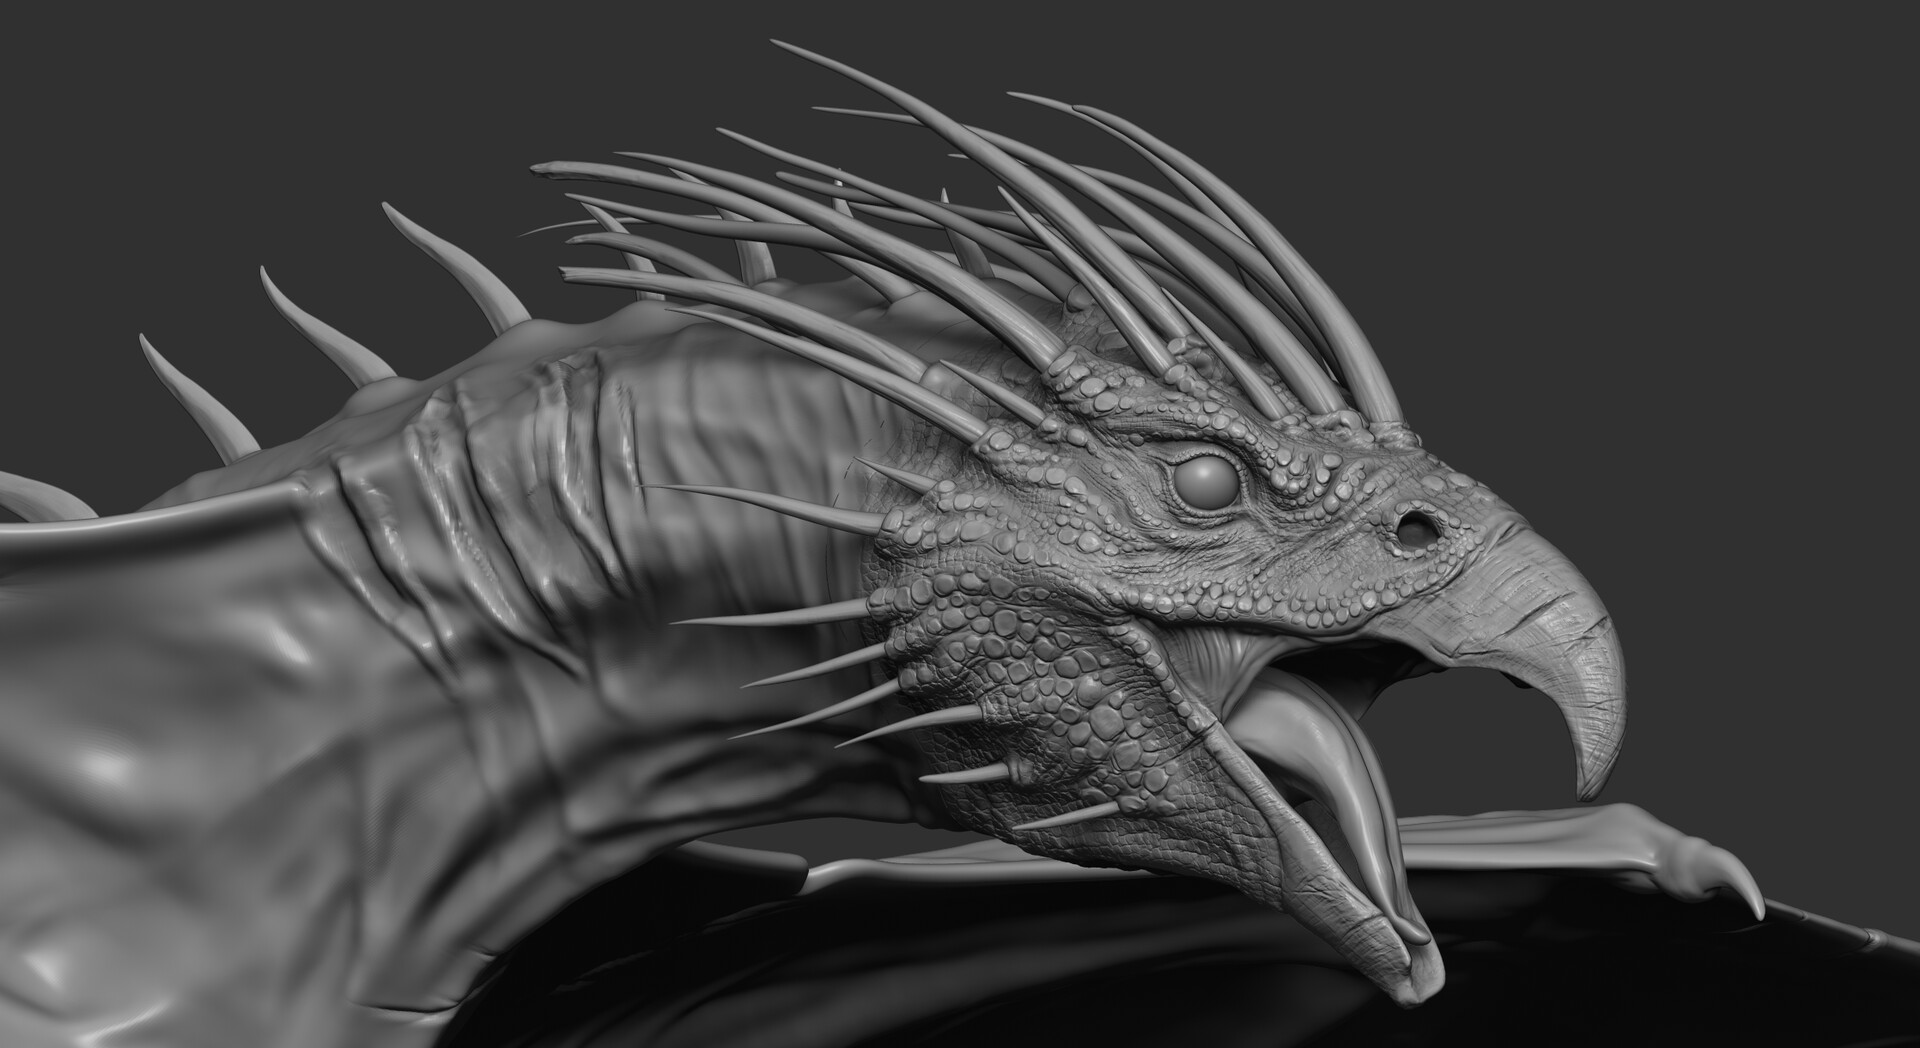
Example of the White Wyvern converted in Curvature Map.
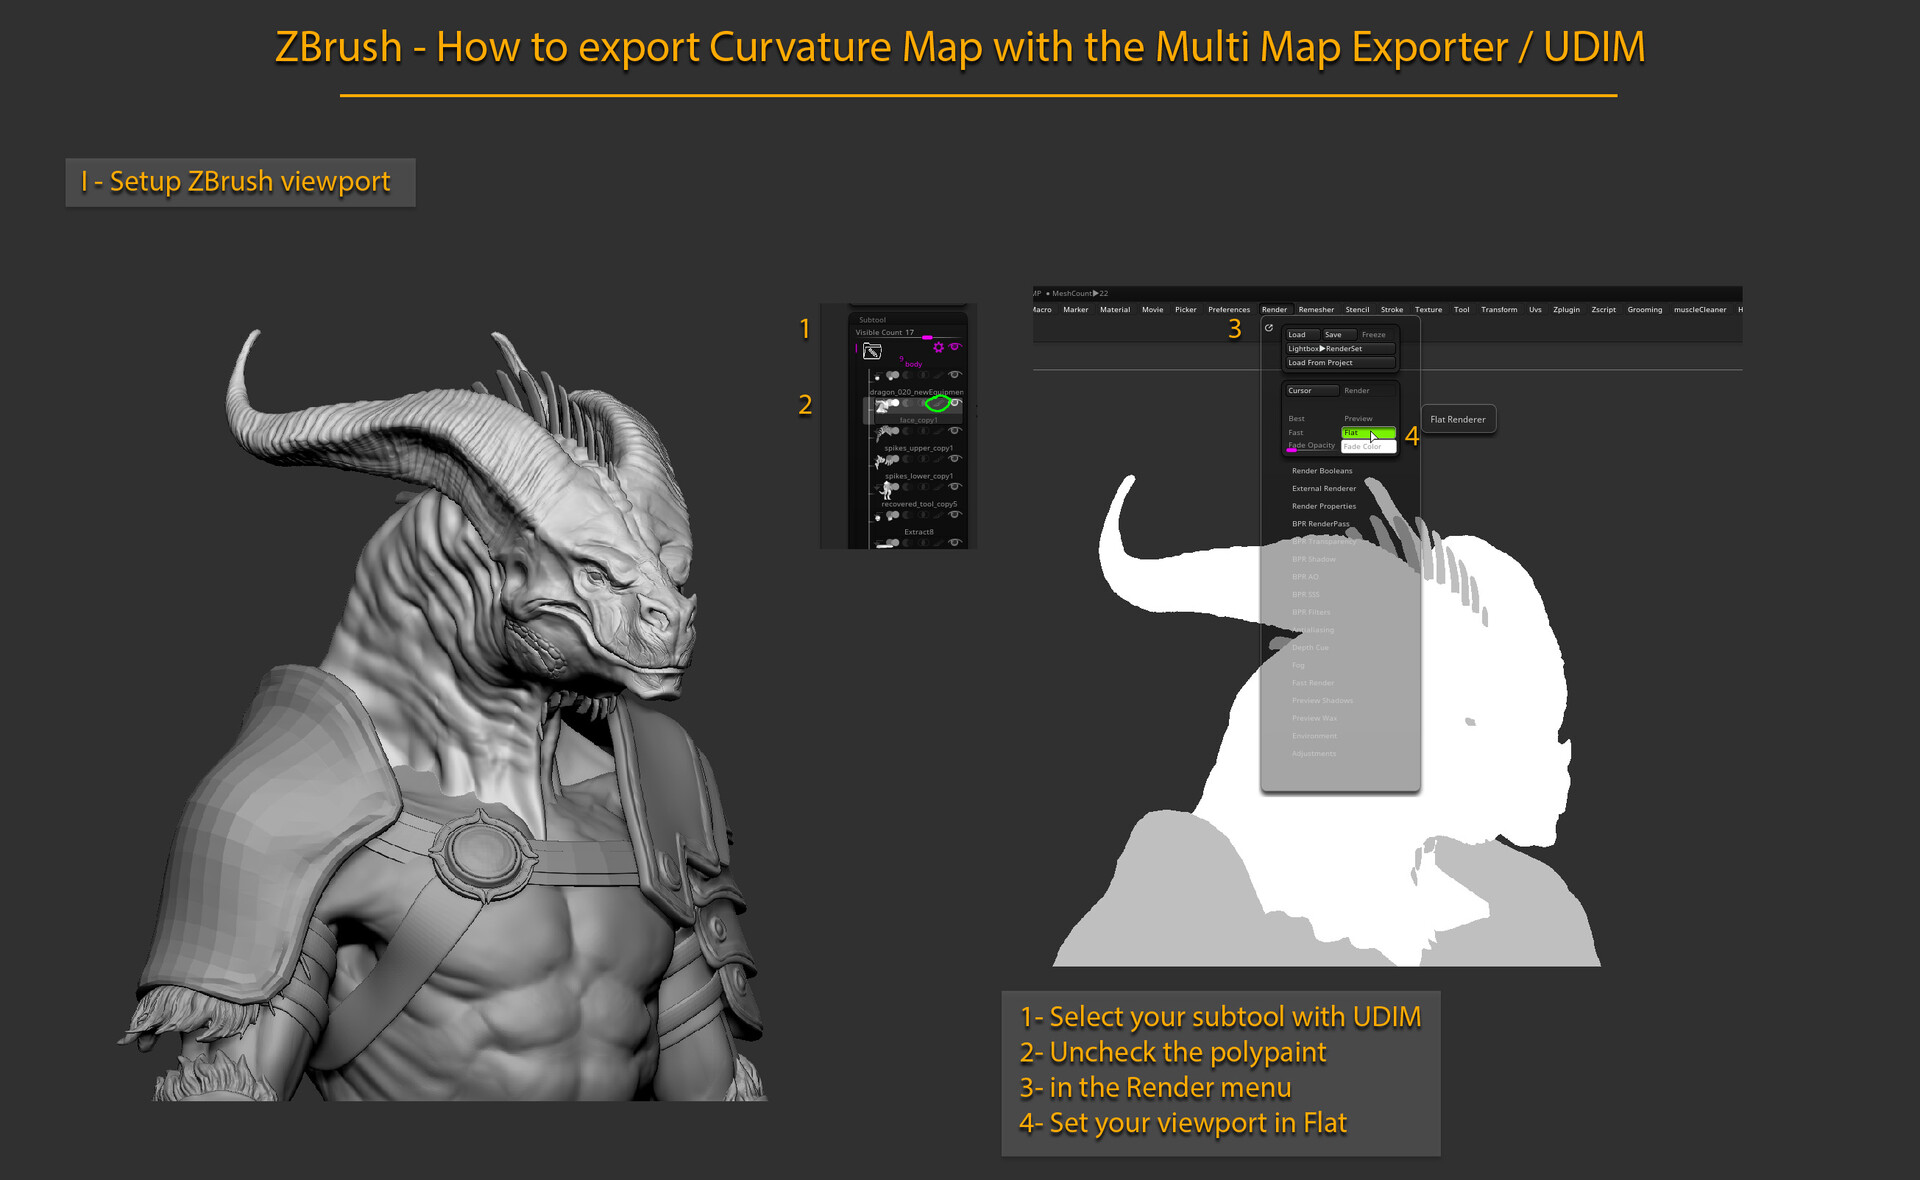
I - Setup of ZBrush's viewport
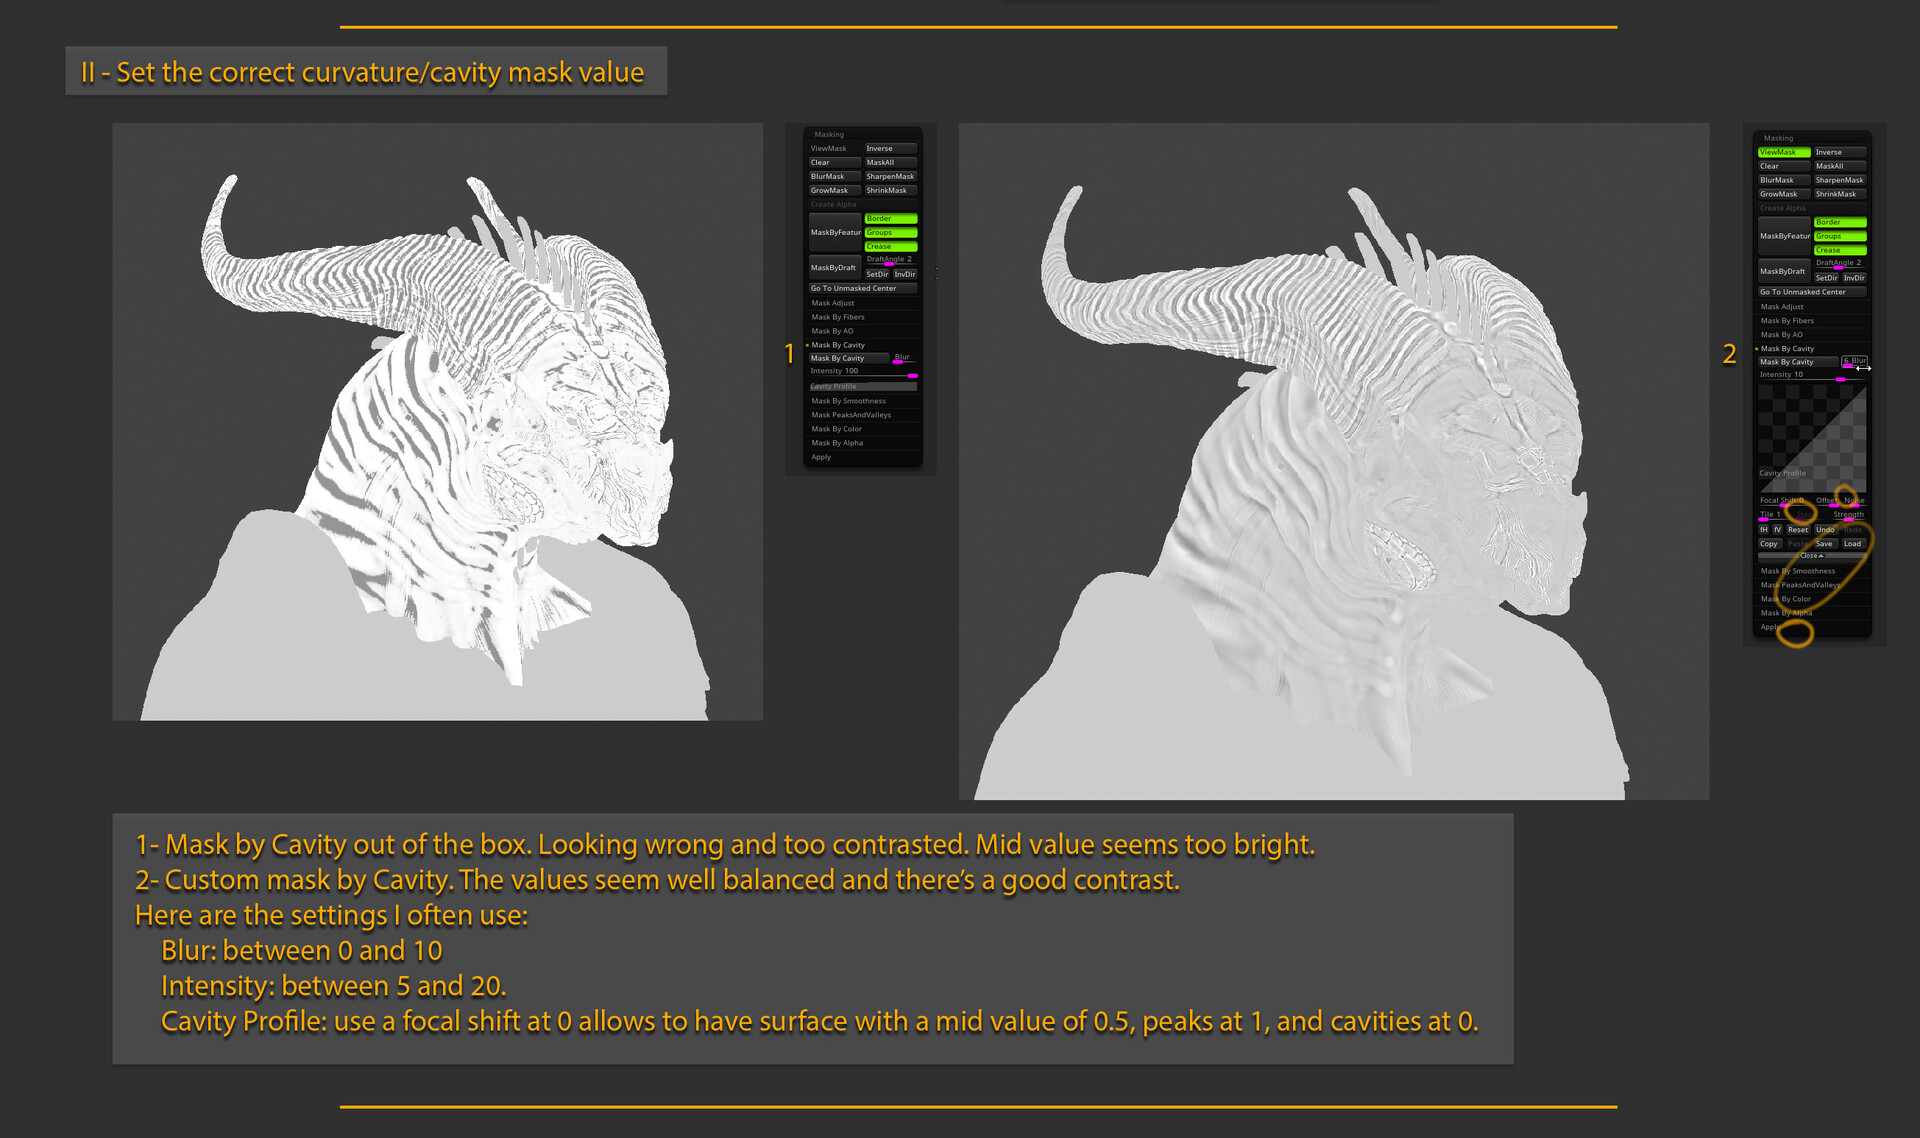
II - Set the correct curvature/cavity mask value
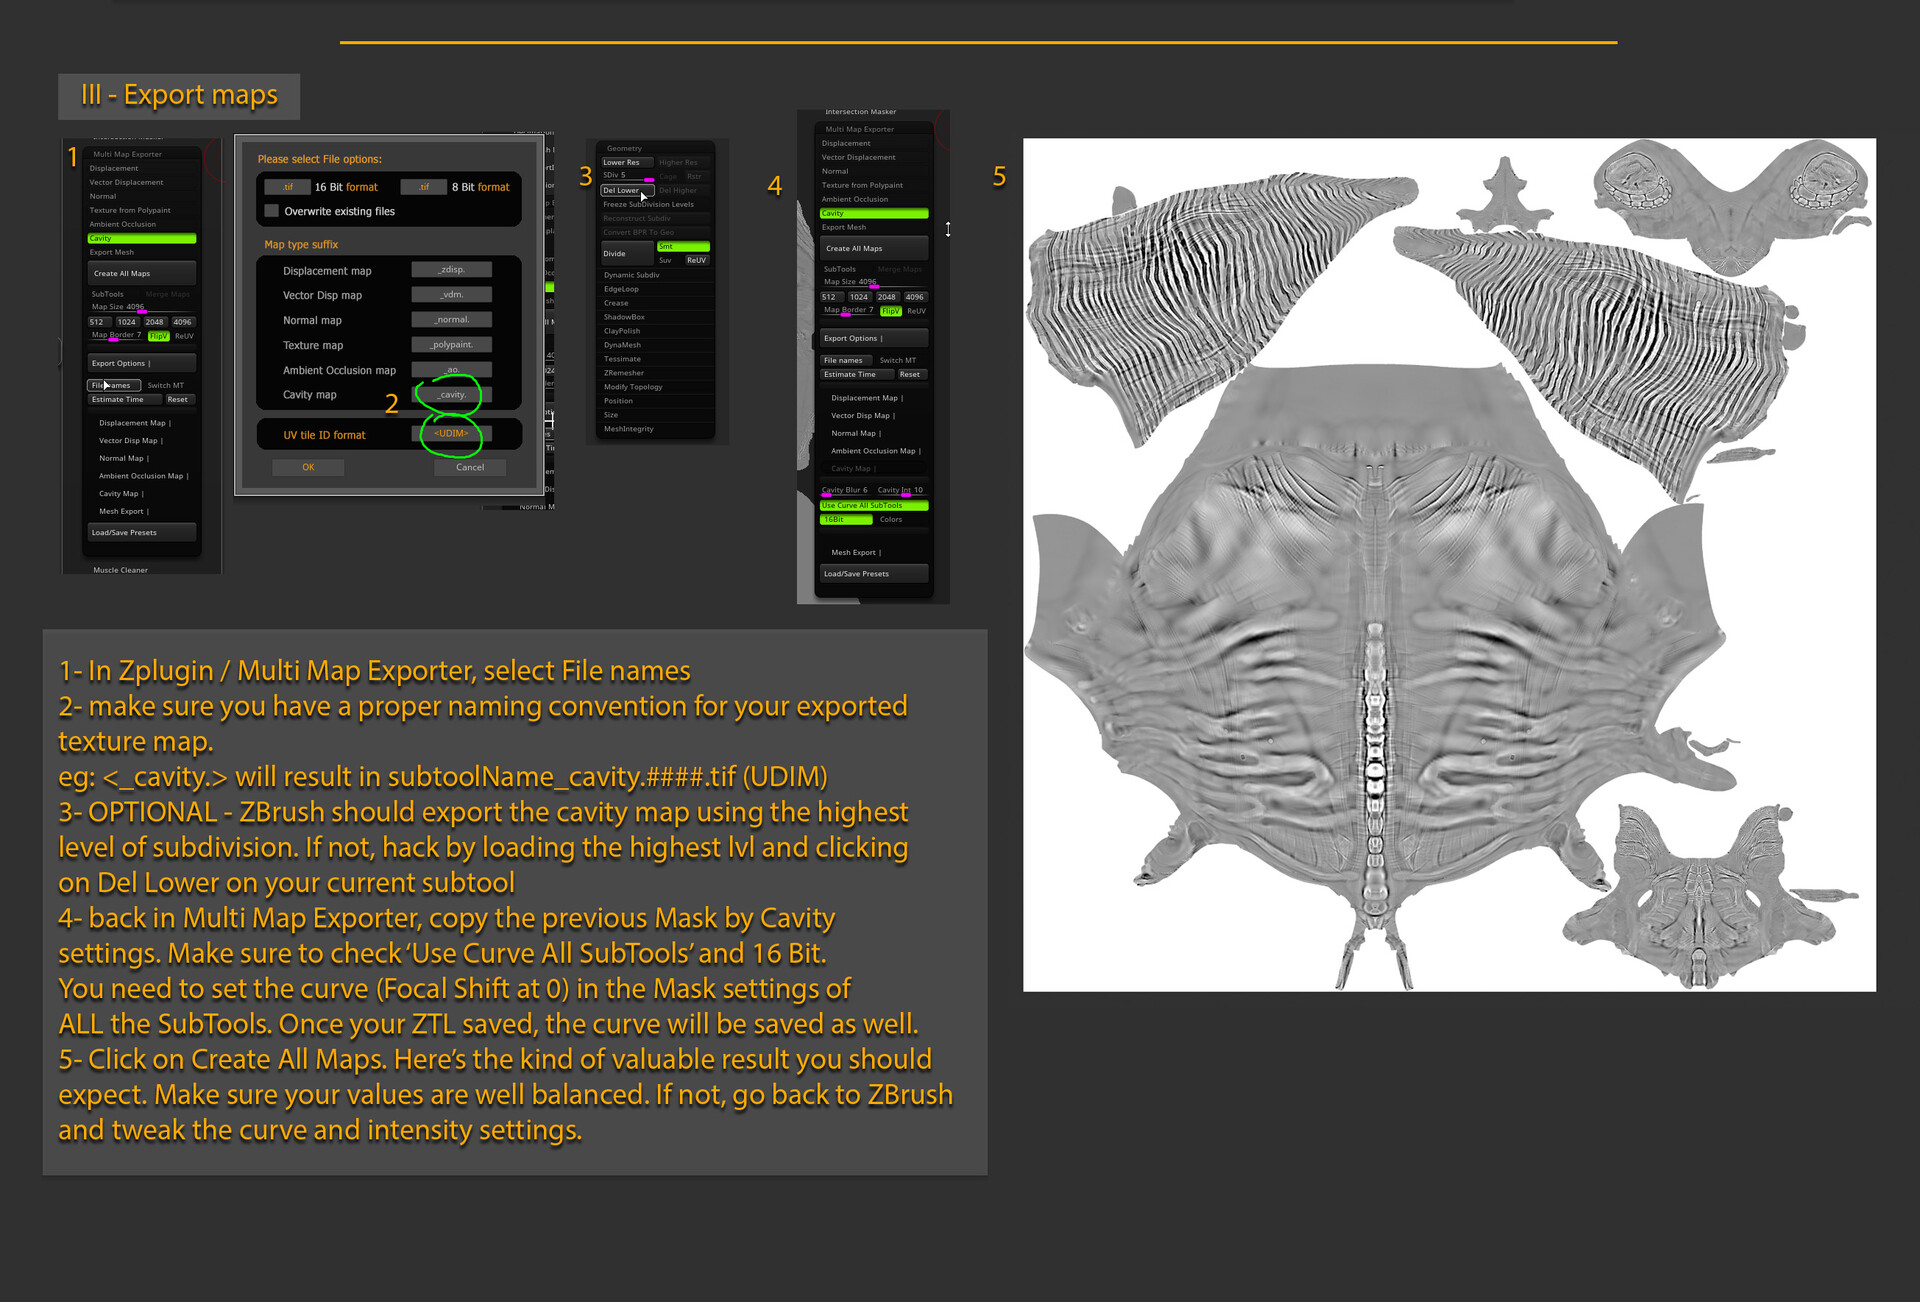
III - Export the maps with the Multi Map Exporter